Introduction: The Dessert That Turns Any Day into a Party
There are desserts you make for special occasions, and there are desserts that create special occasions. The No-Bake Banana Split Cake is firmly in the second category.
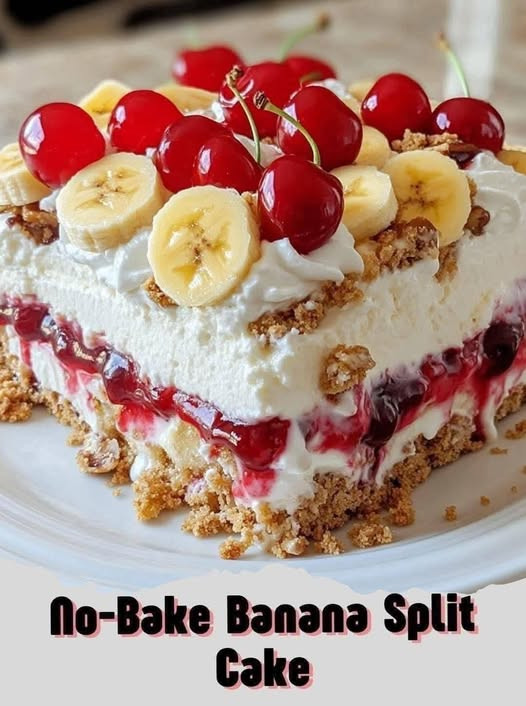
If you’ve ever enjoyed a classic banana split at an ice cream parlor — with layers of banana, strawberry, pineapple, whipped cream, chocolate drizzle, and cherries — you already understand the inspiration behind this dessert. But instead of melting scoops of ice cream, we build those flavors into a creamy, layered, no-bake cake that’s easy to slice, share, and savor.
The best part? You don’t need to turn on the oven. That means this is perfect for hot summer days when you still want to impress guests with something beautiful and decadent. In fact, this dessert has been the star at many of my summer cookouts, potlucks, and family birthdays. It’s light enough to enjoy after a big meal, but rich enough to feel like a treat.
Why You’ll Love This Recipe
No-bake convenience – No oven, no heat, no sweat.
Crowd-pleaser – The combination of creamy filling, fresh fruit, and sweet toppings makes everyone happy.
Make-ahead friendly – This dessert actually tastes better after a few hours in the fridge.
Customizable – You can tweak the flavors and toppings to suit your tastes.
Beautiful presentation – Colorful layers make this a showstopper.
Ingredient List
This recipe makes a 9×13-inch cake that serves 12–15 people generously.
For the Crust:
2 cups (200 g) graham cracker crumbs
½ cup (115 g) unsalted butter, melted
¼ cup (50 g) granulated sugar
For the Creamy Filling:
8 oz (225 g) cream cheese, softened
1 cup (120 g) powdered sugar
1 teaspoon pure vanilla extract
8 oz (225 g) whipped topping (like Cool Whip), thawed
For the Fruit Layers:
3–4 medium bananas, sliced into coins
1 can (20 oz / 565 g) crushed pineapple, well-drained
2 cups (300 g) fresh strawberries, sliced
For the Topping:
8 oz (225 g) whipped topping, thawed
½ cup (60 g) chopped walnuts or pecans (optional)
Chocolate syrup or hot fudge sauce (for drizzling)
Maraschino cherries (for garnish)
Step-by-Step Instructions
Step 1: Make the Crust
In a medium mixing bowl, combine the graham cracker crumbs, melted butter, and granulated sugar.
For Complete Cooking STEPS Please Head On Over To Next Page Or Open button (>) and don’t forget to SHARE with your Facebook friends
Stir until all the crumbs are evenly coated and the texture resembles wet sand.
Press the mixture firmly into the bottom of a 9×13-inch baking dish, using the back of a spoon or the bottom of a measuring cup to create an even layer.
Place the crust in the refrigerator to set while you prepare the filling.
Tip: Press firmly — a well-packed crust holds together when slicing.
Step 2: Prepare the Creamy Layer
In a large mixing bowl, beat the softened cream cheese until smooth and lump-free.
Add the powdered sugar and vanilla extract, and continue beating until creamy and well combined.
Gently fold in the whipped topping using a spatula, taking care not to deflate it too much.
Spread this creamy mixture evenly over the chilled crust.
Tip: Make sure your cream cheese is truly at room temperature for the smoothest filling.
Step 3: Add the Fruit Layers
Bananas: Slice the bananas just before layering to prevent browning. Arrange them in an even layer over the cream cheese filling.
Pineapple: Drain the crushed pineapple thoroughly — excess liquid can make the cake watery. Spread the pineapple evenly over the banana layer.
Strawberries: Arrange the sliced strawberries on top of the pineapple layer.
Tip: For the prettiest slices, try to place the fruit in even rows so every piece of cake gets a little of each fruit.
Step 4: The Final Whipped Topping Layer
Spread the remaining whipped topping evenly over the fruit layers, covering them completely.
Smooth the top with a spatula.
Step 5: Add the Finishing Touches
Sprinkle with chopped walnuts or pecans, if desired.
Drizzle generously with chocolate syrup or warm hot fudge.
Top with maraschino cherries — one for each slice if you want to be traditional.
Step 6: Chill and Serve
Cover the cake loosely with plastic wrap or foil.
Refrigerate for at least 4 hours before serving — overnight is even better, as the flavors meld together.
Slice into squares with a sharp knife, wiping the blade between cuts for clean slices.
Tips for Success
Chill time is key – The layers need time to set for clean slices.
Sharp knife, gentle hand – This prevents the top layer from smearing into the fruit.
Use fresh fruit – While canned pineapple works, fresh strawberries and bananas give the best flavor and texture.
Prevent banana browning – Toss banana slices in a little lemon juice before layering.
Variations & Twists
Tropical Banana Split Cake – Swap strawberries for mango or kiwi, and drizzle with passionfruit syrup.
Chocolate Lover’s Version – Add a layer of chocolate pudding between the cream cheese and banana layers.
Peanut Butter Twist – Spread a thin layer of peanut butter over the crust before adding the cream cheese layer.
Oreo Crust – Replace graham crackers with crushed Oreos for a richer base.
Mini Banana Split Cups – Layer ingredients in small clear cups for individual servings.
Make-Ahead & Storage
Make-ahead: Assemble up to 24 hours in advance and keep refrigerated.
